
RG500 Clutch Upgrade Kit Installation
Drain the oil (remember the 2 drain plugs are the 14 mm and 17 mm bolts on the bottom of the motor).
Loosen the clutch cable all the way on both ends.
Remove the kickstart lever (if it sticks, go to AutoZone or WalMart and purchase a battery clamp puller).
Remove the pinch bolt that retains the aluminum actuator arm and work it off the splines of the throwout shaft.
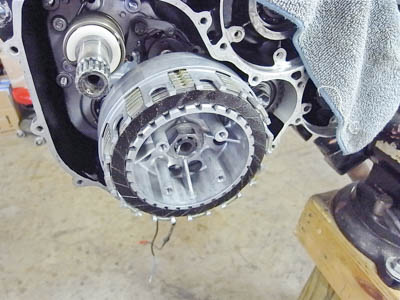
Remove the clutch cover (you may want to carefully bend out the fairing lower support bracket that's in the way).
Proceed to the following steps: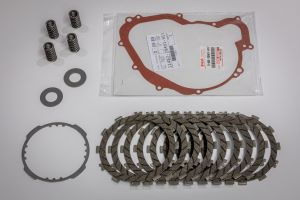 Lay out your new Lance Gamma clutch kit components.
 Using a 10 mm T-handle or ratchet and socket, remove the spring bolts, springs and pressure plate.
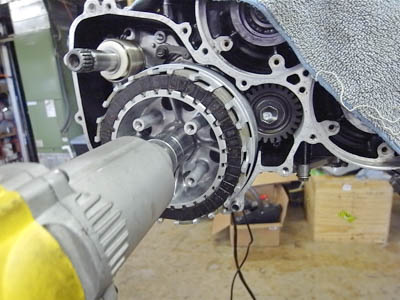
 Bend the lock tab off of the clutch nut and remove the nut with an electric impact gun or air gun and 27 mm socket.
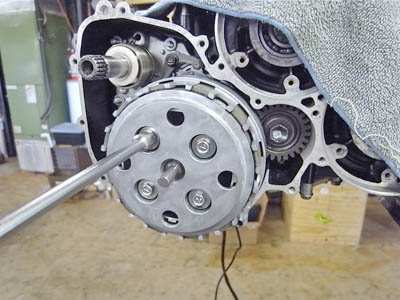
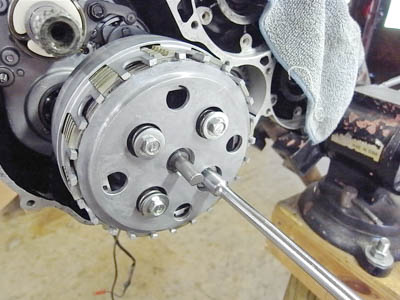
Note photo below how to position a screwdriver or hand tool to prevent the inner hub from rotating when gunning off the nut. Do not use this method with a breaker bar or ratchet and socket. Only retain the hub in this manner when using a gun.
 This only works for taking the nut off with a rattle gun.
Do NOT hold the clutch basket in place like this if using a breaker bar or ratchet and socket. If using a breaker bar or ratchet hold the clutch in place with either Suzuki Tool 09220-53722 or something like the Motion Pro Clutch Holding Tool.
 Applying the gun without such support may allow the inner to spin rather than the nut coming loose.
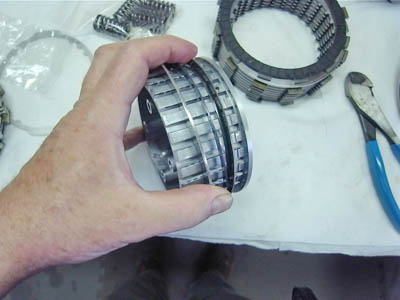
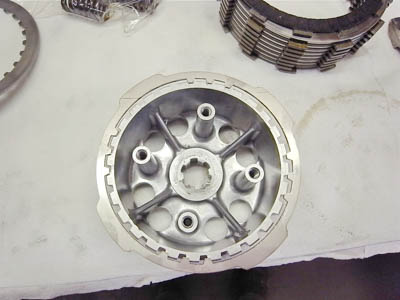
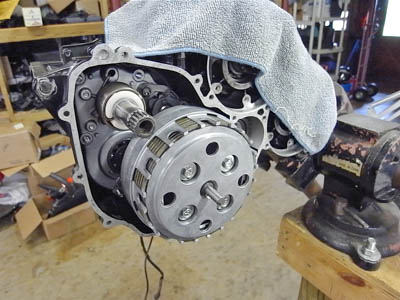
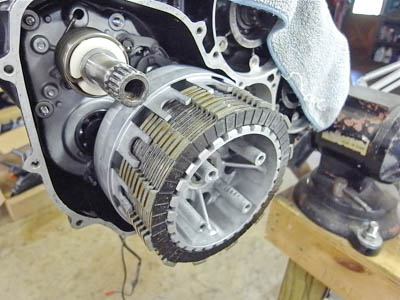 Remove the inner hub and plate stack.
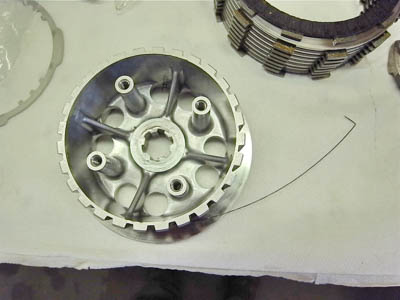
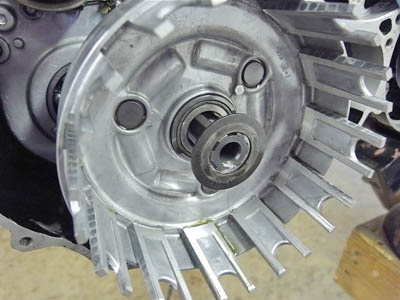 Locate and remove the thin thrust washer and clutch basket.
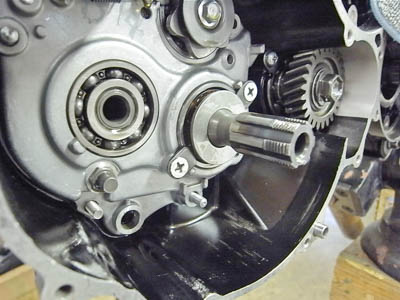
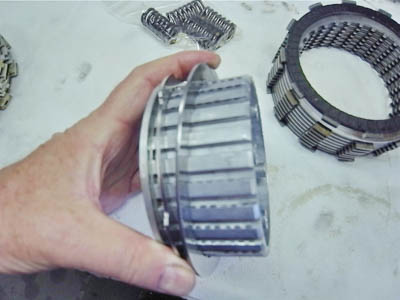
 Remove the clutch bearing and collar with the thick thrust washer.
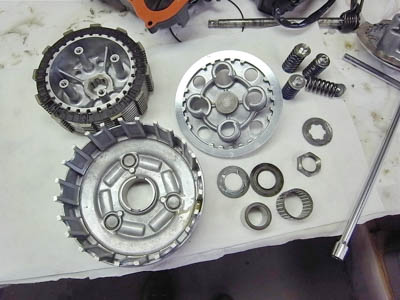 Your group of parts removed should resemble this.
 Install the thick thrust washer with a coating of oil.
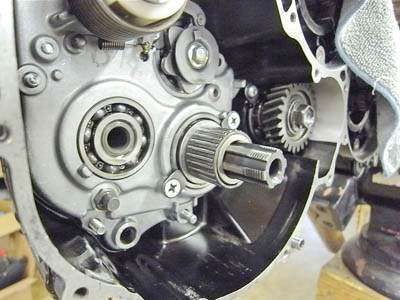 Oil and install the clutch collar and bearing.
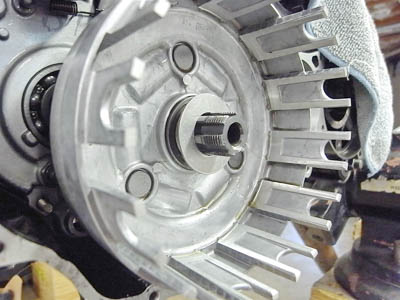 Install the clutch basket and oiled thin thrust washer.
 Locate the piano wire clip ends on the clutch inner hub and snip off with wire cutters.
 After the wire comes off the remove the three components captured by it.
 Seen here.
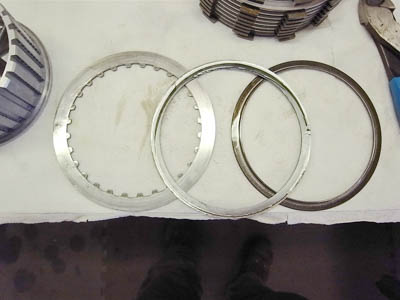 Discard the belleville washer and seat (center and right).
 Place the LG inner hub spacer onto the splines orientated as shown and drop onto the splines.
 Replace the steel clutch plate onto the hub after the LG spacer.
Have the side worn from clutch plate wear face out as before.
 Hold the hub to prevent rotation using either Suzuki Tool 09220-53722 or something like the Motion Pro Clutch Holding Tool.
Tighten the clutch nut to 50-70Nm (37-52lb/ft)
Bend the Clutch Nut lock tab.
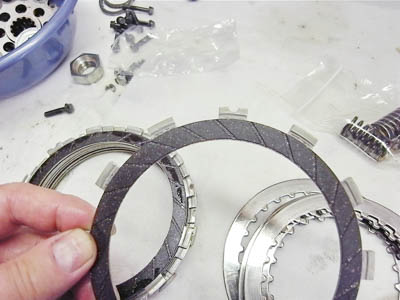 Note that the new plates have 3 tabs with notches for ease of using a pick to remove the plates. Align them together in a row so you can find the notch if you need it.
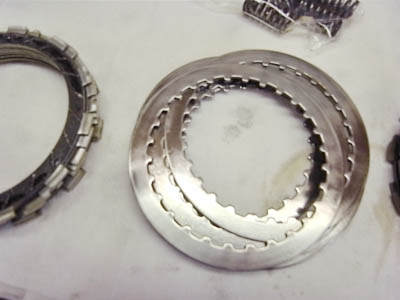 Place all the metal plates in a stack with the rolled edges face up. (One side is sharp and the other is rounded, since they were formed by stamping).
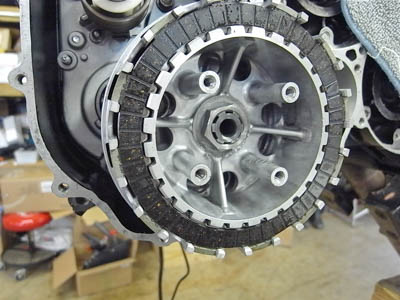
 Install the plates as shown.
Start with fiber, then alternate metal, fiber, metal until you run out of plates; ending with fiber.
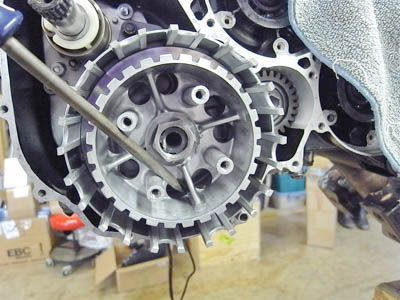
 Install the new springs and tighten down with the 10 mm T-handle. I believe Motion Pro and Cruz Tools have these. Good stuff.
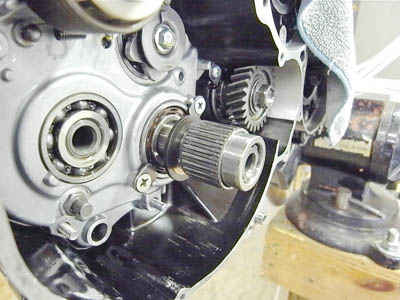
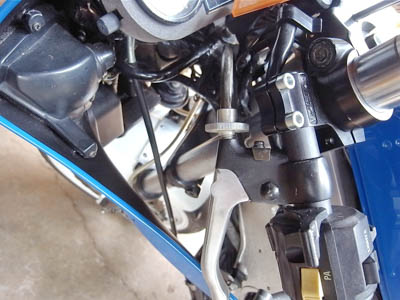
 Note the orientation of the splines on the center pull, facing down at about 7 O'clock.
This is the correct attitude for the throwout arm teeth to engage when you replace the clutch cover.
Note the orientation of the splines on the center pull, facing down at about 7 O'clock.
This is the correct attitude for the throwout arm teeth to engage when you replace the clutch cover.
Replace the clutch cover, using the new clutch cover gasket included in the kit.
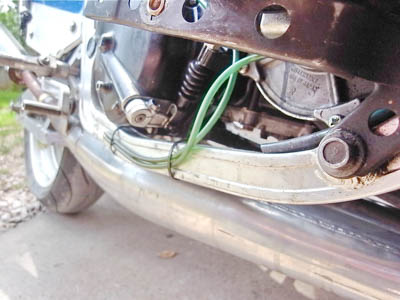 Install the aluminum actuator arm onto the splines of the throwout shaft so that it points slightly down toward the frame rail as shown.
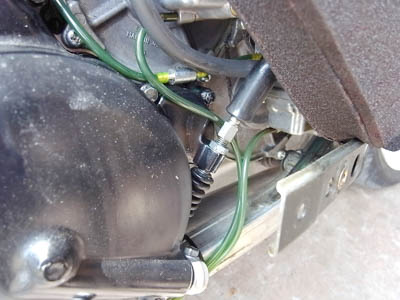 If you have it on the right spline, you will have about this much thread showing here....
 ...and here.
Make sure both of the oil drain plugs have been replaced. Do not over tighten the front drain plug as they strip easily. Snug is good.
Add 800 cc of quality 2stroke gear oil such as Redline or Spectro 80wt. I also have found that the Valvoline VR-1 Racing 50wt (available at Auto Zone, Advance Auto, etc.) works well and is easily found.